Announcement

Collapse
No announcement yet.

Psyvariar 2: The Will To Fabricate

Collapse
X
 
  • Filter
  • Time
  • Show
Clear All
new posts

    I think Revision has spoilt us, if it didn't have a roll button we probably would be in this position now - or we wouldn't be finding it as hard as (some of us) we are.

    Kron, I know what you mean about moving left and right rather than "wiggling" but unless your invincible you cannot move left and right enough to keep spinning when between lines of bullets etc, so wiggling is your only option really.
    Must say also, I found this much easier to play with a PS2 pad rather than a DC one.

    Comment


      Don't know why but I seem to prefer shooters on pad,
      total opposite for beat em up's though.

      I don't think the dreamcast pad is too good though, them sharp edges will cause you enough blisters, my nice vibrating ascii pad dosn't give me any


      Started rinsing this again last night, broke into the 1400 buzz range for area 0 and rinsed the 1st level for very ounce of buzz, felt dam good!

      Anyone got any tips for the 2nd and 5th level bosses,
      on the 2nd whats the maximum levels you can go up on him, I only seem to get more levels up towards the end of his shot pattern with the concentrated bullet bit.

      5th level boss is a bitch!!

      I don't wanna talk about Gluon yet though


      Edit: Forgot to add, I can do all them technques, point blank buzz etc on pad, probly cause I got used to it, I'm just to dam lazy to learn on stick,
      Gives my hands some rest after all that vf stepping anyways

      Comment


        I don't think there's that much difference in the two control systems, as long as you're comfortable with both. I felt instantly comfortable with Psyvariar 2 as soon as I was playing it on the PS2 pad.

        However, I don't feel that the roll button is unnatural/promoting laziness because Psyvariar Revision made me push the roll button's capabilities to the limit. ****, it was months before I could even roll and buzz simultaneously in Psyvariar Revision, but then again, it was the first shooter I played.

        DC pad is a piece of **** for this game, I can't believe anyone is still using it!

        Comment


          Believe it. I'm using the DC pad.

          Comment


            Uhm, nice trick: if you can take down the boss while it's doing a "slow bullet hell" attack, and it explodes completely with bullets on screen, you can milk a few levels when the neutrino gauge switches to green.Oh, and the fact that dieing makes you bomb if you're not close to level up and you can't buzz sucks big time ft:

            Comment


              Found out about timing the shield when you are looking to orbit/buzz a boss attack from origin:

              It's all down to your shield, it's strength depends on it's state: The initial pulse upon level up is very strong then as it gets weaker it's power decreases. So when you are buzzing the origin of an attack on the boss and need to stay in there - make sure you back away from the boss' hitpoint when the shield flashes up and get back in when the shield is weakening.

              I'm feeling this game so much now I want to cry!

              Got Gluon's first form down now - consistant 15k buzz, but the 2nd form still pwn$ me! Got all the stages down now, keeping up with the targets set on the Japanese site but still kind of rubbish at all bosses apart from Earth's and Gluon's first form.

              Comment


                Shield strength in terms of the amount of damage it can do?

                Comment


                  Yeah that's what I mean -

                  You gotta be moving off the boss' hitpoint on the initial pulse of the shield on level-up, then you get back in as the shield dies. Holding that full-on shield on the boss is what kills it so quick.

                  Comment


                    Cool, that explains whats going on during that Area 1 mpg

                    Comment


                      Originally posted by charlesr
                      Yep. I'm playing this on an unmodded PAL DC with the DC-X bootdisc.
                      I am using the same setup, but i am having a problem with the Ranking Data. Everytime i load the game, it tells me that the Ranking Data File is broken. The Settings File is ok, but my scores are everytime gone.

                      I already tried 2 different VMUs, different ports and i have set my DC to japanese, but nothing helps. Any idea on this?

                      Comment


                        Vempire, I had the same couple of times, but every other time it's worked fine, I'm no DC expert so don't know what to suggest, I guess your using AutoSave, I had the problem BEFORE I switched AutoSave on, since then it's been fine

                        Comment


                          Hm, now it works. I copied the other saves on the VMU to another, erased each file and formatted the VMU. And i have set the clock on my DC to the correct date and time. I am not sure what made it work, but it works now and i hope it will continue to

                          Comment


                            Area 6 - GLUON Frog Hands Rev (in progress...)

                            ORANGE NEUTRINO
                            Upon start it really doesnt matter what the Neutrino value is (anything above 30% is good for safety)

                            There are 6 attacks:

                            Mowdown α

                            Blue rings α

                            Heat Coil α

                            Mowdown β

                            Blue Rings β

                            Heat Coil β


                            Attack order is:
                            01 Mowdown α ?2
                            02 Blue ring α ?2 v
                            03 Heating coil α ?2
                            04 Mowdown α ?2
                            05 Blue ring β ?2
                            06 Mowdown β ?2
                            07 Heating coil β ?2
                            08 Blue ring β ?2
                            09 Heating coil β ?2
                            10 Mowdown β ?2
                            11 Blue ring α ?2
                            12 Blue ring β ?2
                            13 Heating coil β ?4
                            14 Mowdown β ?4
                            15 Mowdown α ?1

                            You have an orange Neutrino bar here so the technique is actually REALLY simple! All you have to do is work a routine for each attack and simply apply them as the attacks come round, the system is very stable on this stage. Neutrino rate control is only really needed on the Heating coil attacks - but isnt difficult.

                            Mowdown α
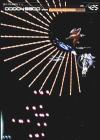
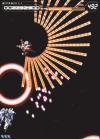
                            GLUON will fly sideways and fire 3 small pink shot clusters at you as it drifts across. GLUON will fire the Mowdown attack after a brief charging sound - it peels off GLUON starting at 12oClock round to just past 6oClock and always fires on the inside edge (NEVER outside)
                            (safest meth) follow GLUON so that the 3 pink shots brush past the front of your craft and buzz the Mowdown attack from a 4oClock (when GLUON is on the right of screen, 8oClock position for left side) position at point blank. This method is safe due to the fact you are never in the path of the Mowdown but your buzz field is large enough to catch it.

                            Mowdown β
                            Same angles, timing and speed as Mowdown α but double the amount of shots: Instead of following and letting the pink shots brush past, lead GLUON this time. when he get's into firing position loop round the back of him and take the Mowdown attack from 9oclock (when GLUON is on the right of screen, 3oClock position for left side) and wind round slightly with it. It doesnt matter where your Neutrino is - you level up muliple times if you take this attack from point blank. When taking either Mowdown attack you can adjust the Neutrino for the next attack by staying near GLUON or by following the shots outwards a little longer. If you find taking this attack from 3oClock/9oClock position very difficult take it the same as Mowdown α (you get less buzz but it's safe)

                            Blue ring α and Blue ring β
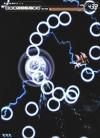
                            This attack is your safety net - either version is taken the same way, it doesnt matter what value your Neutrino is when you initially start the shield at point blank. Blue rings increase your Neutrino at a stupidly fast rate, these D shaped bursts are to be followed with hard rolling to keep the shield going. When you hear the charge for this attack get in point blank in front of GLUON and hard roll left and right - you will see the shield pulse a few times but you'll actually be getting 2 or 3 levels each time the shield pulses it's so fast! Once you have taken the levels off the point blank position, wrap round using hard rolling to follow the D shaped inner path once upwards and once back downwards and straight away back into the point blank position to take the next set.
                            It's always the same: Point blank - once up - once down - point blank....
                            But be aware that soft rolling is not enough to keep the shield going as the rings' path gets wider as they drift outwards, use hard rolling the whole time.

                            Heating coil α
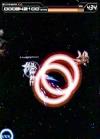
                            OK now it's all science - GLUON will fire 2 red Heat Coils with around 3 seconds delay between them, these increase your Neutrino slowly so timing is needed to get inside and back out. It's ALL down to how you come off the last attack to get into this one, with a little practice you'll pwn this - you need to come off the Blue ring α attack just right.
                            OK so you are hard rolling to follow the D shaped path the blue rings make and GLUON is now charging the first of the Heat Coils. You need to get it so that with your shield still on from the blue rings you get a little extra Neutrino off the blues and get inside the first red Heat Coil as the shield goes (inside the red coil by the time you are back to around 60%-70% charged works for me, but please experiment). You dont have much time before the next coil is fired so use a tight circular motion to gain another shield as the 2nd ring is fired and fly into that. If your Neutrino is too low shoot at GLUON to boost it a bit, if too high - stop spinning (the Neutrino build-up stops dead if you dont spin inside a red coil). Get out of the 2nd ring with shield on in time for when you hear the charge for the next attack (Mowdown α ?2) and take it point blank.
                            So it's: Off blues, 60% inside 1st coil, activate shield for next coil, get in, activate shield for Mowdown α ?2, point blank.

                            Heating coil β
                            I can take this one without problems but it's SO hard to put into words! >_<
                            First of all there are 3 elements to this attack, a spiral blue shot which boosts the Neutrino fairly well, a pink version of the former which boosts less and a red Heat Coil which builds you up slowly. Like the previous one it all depends on how you get into it from the last attack Mowdown β . For best results I make sure that I adjust the Neutrino after taking the last Mowdown β back up to 70%-80%, Heating coil β begins with GLUON moving from right to left trailing a spiralling blue shot. The angle it trails at lets you get in really close and follow - buzzing the blues shot as you go, when GLUON gets to the left of the screen it will fire off the main part of the attack (red Heat Coil + spirals) so you have to make sure you get the shield off the blue spiral in time. Once inside the red coil GLUON will repeat the attack in the other direction, here's where it gets complicated: You need to keep a loop going, one shield + extra buildup to get into the coil, once inside you need another shield in order to trail GLUON as it fires off the next blue shot + ring and so on....
                            Trail blue to get shield - get inside coil with shield - get another shield within the coil and trail blues again - repeat. The red coils stay on screen for ages so you'll get enough buzz to chain the shield once they are all onscreen quite easily.

                            Hope you understood that and hope it helps - I've memorised it all and can see it happening as I type but it's hard to explain, using my meths I'm getting 17000buzz by the time this phase finishes. Any tips anyone has for the phase afterwards would be wicked!

                            Comment


                              Caaaarple nice area 2 boss tricks!

                              H.D.S-ATP3


                              During these attacks you can sit at the side of the screen perfectly still and rolling - everything will miss you. The boss cannot fire directly at you if you are too high up, so sit in one of the lanes nearer the top (near the boss' front leg). All you do is sit in a lane it cant fire directly at you so you are safe fro this + the next attack if you just sit there:


                              During the above attack - you know it fires a tri laser from it's mouth? Next time you see this shot pause the game as it leaves it's origin - you'll notice there is a gap and if you get through the pink lasers and sit in this gap as the tri laser fires you'll buzz the whole thing.

                              Comment


                                I got a tip for the earth boss . During one of his attacks he'll fire 4 laser beams one after another from the right. I hope you guys know what im talking about. Anyway, to buzz this attack, i start off on the right with the furthest laser beam. The next laser beam will then start to fire. At this point, you'll be between the laser beams. Its safe to just roll to get the buzz. I usually level up during this attack at which point i move to the other set of lasers on the left fully utilising the brief moment of invincibility. However, there are times when my neutrino gauge is in the wrong position so that i dont level up (or level up to early) causing me to miss the buzz from the laser beams on the left side. Well, heres the trick. You can move between the laser beams without being hit! Move to the top of the two beams slightly above the laser barrel and you'll be able to move across to the otherside unscathed! With this technique you dont have to worry about the neutrino gauge too much and youll still be able to get the maximum buzz from the 4 lasers.

                                Comment

                                Working...
                                X